Monday, August 26, 2013
CTFAC Exhibit and Labor Day Sale in Norfolk
I am a member of the Connecticut Fiber Arts Collective. If you haven't had a chance to over to Norfolk to see our exhibit of handmade gift items at the Norfolk Artisans Guild in the center of town there is still time.
Saturday, July 20, 2013
Felting Vintage Textiles - Mary Lachman's technique in Quilting Arts Magazine - August/September 2013
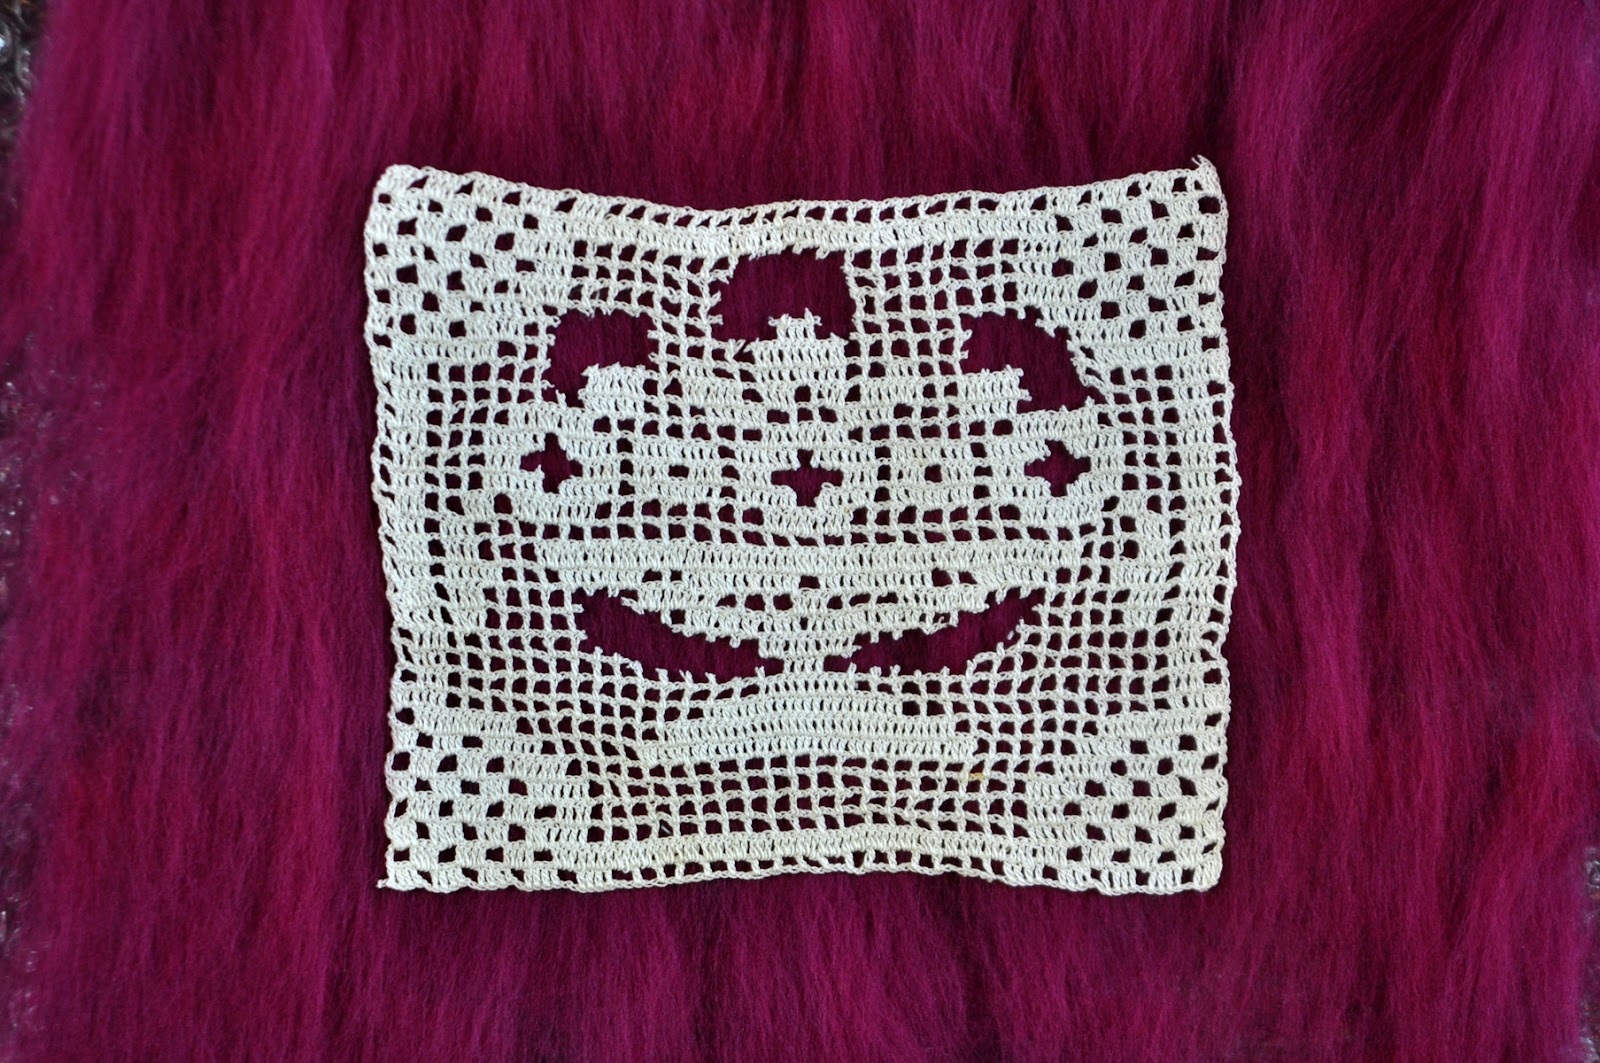
I am thrilled to announce the publication of my technique to recycle vintage crocheted doilies and create new fabric pieces. It is in the August/September 2013 issue. If you are not already a subscriber, you can order a copy online today or find one at your nearest fabric shop or bookseller!
Below is a photo of a piece that was not selected for the publication, but this is the "before" the felting process with the doily sandwiched between a base of wool roving and decorative roving laid out on top.
And this photo shows the same piece after it has been felted and quilted. The new piece can stand on its own, be mounted on canvas or fabric, or be incorporated into another quilt. The possibilities are endless. Try it today. If you have any questions, please send me a comment.
Thursday, June 20, 2013
Scotch Twist - Free Quilt Pattern
Time for another baby quilt! This one is off to Baby D, son of my friends Savva and Yanna. This is my original design. I have written out the pattern if you would like to make one for a little cherub in your neighborhood.
| Scotch Twist 32" x 32" |
| Scotch Twist Closer View of Center Square |
Scotch Twist Quilt
Size: 32” x 32”
By Mary Lachman
Quilt designed by Mary Lachman
Quilt made by Mary Lachman
Materials Needed
· 2 dark fat quarters – chose floral, novelty or stripes to contrast with the light fabrics and sashing
· 2 light fat quarters
· 1/3 yard dark fabric for sashing
· Scrap fabrics to blend with the dark and light fat quarters
· ¼ yard for binding
· 1 yard backing fabric – or use the excess fabric from the fat quarters to piece the back
· 36” square quilt batting
· Thread to match fabrics
· Hand or machine quilting thread
Tools Needed
· Ruler
· Rotary cutter and mat
· Scissors
· pencil
· Iron and ironing board
Cutting and Piecing Directions
Step One: Cut the Fabric Pieces
1. All measurements include ¼” seam allowance.
2. Cut out the fabric pieces
3. Cut the fabric along the crosswise grain the total width of your fabric.
4. Cut eighteen 4 7/8” squares from dark and light fat quarter ( note to self: can get 12- 4 7/8” squares out of each FQ).
5. Cut eight 1 ½” strips from dark sashing fabric.
6. Cut four 2 ½” strips from binding fabric.
7. Cut remaining scraps into 2 ½”strips for pieced border
Step Two: Piece the Quilt Blocks Note: all dimensions on the cutting chart are cut size. The number at the top of each column is the width of each cut in that column
Make Half Square Triangles (HSTs)
1. Layer one dark 4 7/8” square with one light 4 7/8” square, right sides facing.
2. With a pencil, draw a diagonal line from one corner to another of the light square.
3. Stitch a 1/4” on each side of the diagonal line.
4. Use rotary cutter to divide the HST on diagonal pencil line. Each 4 7/8” square will yield two 4 ½” HST squares. Press seam toward dark fabric.
Make Pinwheel Blocks
1. Arrange four, 4 ½”HST squares, alternating dark and light corners to form resemble pinwheels.
2. Stitch two squares together. Press seam.
3. Stitch other two squares together. Press seam.
4. Stitch each of the two squares into a 4 square pinwheel unit. It should measure 8 ½” square.
5. Arrange pinwheel blocks on design wall or floor to check arrangement.
Sash in Between Pinwheel Blocks
1. Stitch 1 ½” strip to one side of six pinwheel blocks.
2. Press seam toward 1 ½” strip.
3. Align other side of 1 ½” strip on one block to un-sashed opposite side of another block. (You will be matching 3 to 3.)
4. Stitch together. (Your section of blocks will be: pinwheel-sash-Pinwheel-sash).
5. Stitch another pinwheel block to the end sash of each line of blocks (pinwheel-sash-pinwheel-sash-pinwheel)
6. Stitch two 1 ½” x 44” strip in between each row of pinwheel-sash-pinwheel-sash-pinwheel. Trim off excess of 44” strip even with the end of blocks.
Add Outer Borders
1. Strip piece 2 ½” wide short lengths of medium and light scrap fabrics end to end until piece measures 24” long. Add a 2 ½” x 6” length of the same color of fabric to each end. Make a total of 4 strips like this one.
2. Stitch a 1 ½” x 44” strip to one of the scrappy strips made in the first step.
4. Repeat steps 2 and 3, three more times.
5. Stitch borders on, miter corners if you prefer.
Make a Quilt Sandwich and Quilt
1. Sandwich quilt top, batting and backing together.
2. Pin to hold in place.
3. Quilt as desired. The sample was quilted by hand ¼” from each of the seams.
Bind
1. Stitch four 2 ½” fabric binding strips end to end. Press seams open.
2. Fold and press the strip in half lengthwise.
3. Place binding on right side of quilt matching raw edges of binding to edge of quilt.
4. Stitch the binding onto the quilt ¼” from edge.
5. Fold binding over to back of quilt.
6. Finish by stitching binding to back by hand or machine.
Sunday, June 9, 2013
Bartlett Arboretum and Botanical Inspirations
The opening reception for Botanical Inspirations: Capturing Nature in Fiber is today from 12 noon to 4 p.m. in the Visitor Center at the Bartlett Arboretum.
Come out and see the show---Bring a friend and tour the gardens. More than 25 works of art will be on exhibit featuring all members of the CTFAC (Connecticut Fiber Arts Collective), a group of artists dedicated to fiber and mixed media.
The exhibit continues through June at the Bartlett Arboretum and Gardens, 151 Brookdale Road, Stamford, Connecticut.
Come out and see the show---Bring a friend and tour the gardens. More than 25 works of art will be on exhibit featuring all members of the CTFAC (Connecticut Fiber Arts Collective), a group of artists dedicated to fiber and mixed media.
The exhibit continues through June at the Bartlett Arboretum and Gardens, 151 Brookdale Road, Stamford, Connecticut.
Saturday, May 18, 2013
"Beyond the Bed: The American Quilt Evoluton" in Katonah, NY
Last week on my way home from work I drove to Katonah, NY to see the quilts at the art museum.
It is a lovely exhibit combining traditional and contemporary works of art. There are several vintage quilts on loan from the Shelburne Museum, as well as a Gee's Bend quilt in polyester, a wire and metal wall hanging, a 3-dimensional free-standing quilt, and an all-wood, carved and sanded quilt-artwork.
If you can spare the time, it is well worth a visit before the exhibit closes June 13th. Check the website for docent tour dates and times. http://www.katonahmuseum.org
(And although the museum is the opposite direction from downtown Katonah, the quaint village is a great place to grab a coffee or a bite to eat.)
It is a lovely exhibit combining traditional and contemporary works of art. There are several vintage quilts on loan from the Shelburne Museum, as well as a Gee's Bend quilt in polyester, a wire and metal wall hanging, a 3-dimensional free-standing quilt, and an all-wood, carved and sanded quilt-artwork.
If you can spare the time, it is well worth a visit before the exhibit closes June 13th. Check the website for docent tour dates and times. http://www.katonahmuseum.org
(And although the museum is the opposite direction from downtown Katonah, the quaint village is a great place to grab a coffee or a bite to eat.)
Saturday, April 27, 2013
Spiraling Out
![]() |
| Spiraling Out of Control 17" x 48" |
I just finished this piece. I am calling it "Spiraling Out of Control". It was started more than a year ago with machine-pieced fabric based that I quilted using a free-motion swirling design. Then I sprinkled powdered fabric dye on top and added fabric spirals backed in fusible web.
Sunday, April 14, 2013
Sneak Peak - Felting Vintage Textiles
I am pleased to learn that an article I wrote, "Felting Vintage Textiles", has been accepted for publication in the August/September 2013 Quilting Arts Magazine!
The article explains my technique in step-by-step detail with lots of photos to enhance your understanding. Here are a few pictures showing the before and after of two projects. Be sure to look for a copy of Quilting Arts Magazine later this year for a full article.
| Before: crocheted panel is laid atop wool roving |
| After: crocheted panel has been sandwiched in wool fabric |
| Work in Progress |
| Before |
| After |
Subscribe to:
Posts (Atom)
Creative Magic
In her book Big Magic , Elizabeth Gilbert (who is best known as the author of Eat, Pray, Love ) writes "I believe the creative process ...