Today I am announcing my new blog, Mary Lachman Designs. Here is the link: www.marylachmandesign.blogspot.com
I believe the new title better reflects the range of my artwork.
If you have followed me for more than a month, you know that I create quilts, mixed media art, and fingerless gloves. I also spin, felt wool, and design my own patterns. Hence, the old blog title seemed too restrictive.
I released my first post on the new blog today. Please let me know your thoughts. I intend to keep this blog going for a short time, longer if readers wish me to!
Thursday, December 19, 2013
Tuesday, December 17, 2013
Final Weekend at Flanders Holiday Artisan Sale
This Saturday and Sunday, December 21 and 22, are the final days of the Flanders Nature Center Holiday Artisan Fair. So I put together a selection of fingerless gloves to add to my piece that are already there.
Remember a portion of all sales benefits children's programming at the Nature Center.
For more information check out this link: http://www.flandersnaturecenter.org/pdfs/fla_artisanmarketplace.pdf


Thursday, December 12, 2013
Fingerless Gloves at the Flanders Nature Center Holiday Artisans Show, Woodbury CT
These next two weekends will be the final days to see and buy a piece of handmade art by a Connecticut artist at the Flanders Nature Center Holiday Exhibit.

I will be adding several different styles of handknit fingerless gloves to the exhibit. These are all my own design. I will also have several new pieces of quilted wall art available. Other artists have handpainted ornaments, handwoven scarves, and handspun alpaca yarn for sale. There is truly something unique for everyone on you love. A portion of all sales go to benefit programs at the Nature Center where children and adults learn about the environment.

Here is a link for more information: http://www.flandersnaturecenter.org/pdfs/fla_artisanmarketplace.pdf

Sunday, December 1, 2013
Spinning and Knitting Demonstration at Flanders Nature Center
Today I will be at the Flanders Nature Center in Woodbury, CT demonstrating the transformation of wool roving into yarn with a spinning wheel during the Holiday Artisan's Show and Sale.
Woodbury is a wonderful destination with lots to see and do including hiking trails at the Nature Center, Woodbury Pewters, and many antique shops.
Stop by and see me if you have a chance. I will be there from 12 noon - 2 p.m.
Here is a link for more information: http://www.flandersnaturecenter.org/pdfs/fla_artisanmarketplace.pdf
Monday, October 28, 2013
Feathering the Pop-Up Nest
On Saturday, after a mentorship meeting with Jane Davila, several of is stayed to clean up a small studio that we are renting as the Pop Up Fiber Artists during the Bridgeport Arts Trail, November 8-10.
This amazing group of women will be exhibiting and selling quilts, fiber arts, wall hangings, and accessories. We will be at the top of the stairs on the 2nd floor of the Nest Arts Factory, 1720 Fairfield Avenue, Bridgeport. Mark your calendars and come see us!
I have been experimenting with hand-dying and leaf stamping. This is one of my pieces that will be for sale that weekend. It is 8"x10" and gallery mounted on stretched canvas and ready to hang.

Monday, October 21, 2013
"Tree in the Forest" for SAQA CT exhibit at the Slater Museum

This is a small art quilt that I just completed. It will be offered for sale at the Slater Museum in November in conjunction with the "Local Color" exhibit December 8, 2013 - January 14, 2014. A portion of the sale of this item will go to the Slater Museum.
The "Local Color" opening reception will be Sunday, December 8, 2013 from 2:00 - 4:00 p.m.
Slater Memorial Museum on the campus of the Norwich Free Academy
108 Cresent Street
Norwich, CT 06360
Sunday, October 20, 2013
Boxed to the Brim: Donation to 500Hats.org
Yesterday we spent a beautiful autumn day with our younger son at his college in Massachusetts. It was Family and Alumni weekend and there were all types of activities going on from student research presentations to a farm festival and a horse-drawn wagon.
Among the attractions of that region is Northampton and Webs Yarn shop. If you love wool as I do and you have never been there, it is time to plan a trip. Yesterday we managed to stop there on our way to a coffee shop around the corner.
As it would happen, Webs, as well as Northampton Wools, is collecting hats for children and adults in conjunction with the 500 Hats Project www.500hats.org . If you are a regular follower, you know I enjoy making hats too. The inital goal was to collect 500 winter hats for distribution throughout the Pioneer Valley region of Massachusetts. They met that first goal and have now set the second goal of 1500 hats by the end of October!
I was so inspired that I have decided to pack and ship 21 hats that I made over the last 3 years. They are all colors, two-thirds are felted wool, and about half are children's sizes.

It is not too late to send hats in. I am shipping mine to Webs, but you can also drop off at numerous yarn shops around the Springfield-Northampton area. If you have questions check the website or send an email to: warmhats@gmail.com
Sunday, October 13, 2013
Spool in Time
Just finished is my donation block for the 25th Anniversary Celebration of the Windham Textile and History Museum in May 2014. The museum in Willimantic, Connecticut.
Willimantic is from a Native American word for "land of swift running water". The town's industrial base in 1828 was the cotton thread industry. By that year the town was home to 6 cotton factories. Willimantic was once home to the American Thread Company, which was once the largest employer in the the state, and one of the largest producers of thread in the world.

The spool is made from vintage linen. The ends of the spool are the same fabric that has been painted. Raw edge appliqué was used to affix the label to the top of the spool. The spool was then stitched onto a piece of my own hand-dyed fabric made by using Carol R. Eaton's ice dying technique www.carolreatondesigns.com
This block along with dozens of others created by SAQA-CT members will be incorporated into the show quilt. Check back for more information on this exhibit.
Wednesday, October 2, 2013
Back to the Red, White, and Blue!
Finished is the pieced backing for the RWB quilt that I posted a week or so ago.
Here it is partially laid out on my studio floor.

And here it is completed. I used leftover blocks of various shapes and sizes adding strips of similar fabric wherever need to fill in.

Here it is partially laid out on my studio floor.

And here it is completed. I used leftover blocks of various shapes and sizes adding strips of similar fabric wherever need to fill in.

Tuesday, October 1, 2013
How to Make a Mitered Border using 3 Fabrics
Many of my early quilts featured flat strip borders that met at a 90 degree angle and often I would add borders one strip at a time to the finished quilt top. This was an effective, albeit utilitarian way to finish.
Since then I have learned to sew border strips together lengthwise first, then attach them to the quilt top using mitered corners. The result is crisp and tidy. This is the border I put on the RWB quilt in my previous post. I think you might like the result.
Steps:


Since then I have learned to sew border strips together lengthwise first, then attach them to the quilt top using mitered corners. The result is crisp and tidy. This is the border I put on the RWB quilt in my previous post. I think you might like the result.
Steps:
- Gather 3 fabric strips (I suggest you use three 2" x 30" strips of three different fabrics and a 12"-18" square of scrap fabric to practice and gain confidence with the technique before trying this on your next quilt).
- Sew the three 2" strips together lengthwise.
- Cut 30" length into two 15" segments.
- Press the seams to the center fabric strip on one 15" segment, and away from the center fabric on the other 15"segment
- Sew the 15" segments onto adjoining sides of your 12"-18" practice square. Do not sew all the way to the corner, leave about 1/4" free at end where the strips meet.
- Fold one strip back at 45 degree angle. See photo below.
- Fold second strip back at 45 degree angle to match. Make sure the seams of border strips are pressed in opposite directions so the strips nest. Press.
- Carefully turn over, pin strips together.
- Sew on folded mark from outer edge to inner corner.
- Open and admire your handiwork. Trim seam.
- Repeat these steps on other corners of quilt top.
 |
Step 6 |

Step 7

Step 8

Step 9

Step 10
Monday, September 16, 2013
Red, White, and Blue Quilt
I just finished the borders on the RWB quilt. I like the way the RWB bordered turned out.
I used scraps to make R-W-B-W-R-W-B- etc blocks that were then sandwiched in between two blue and white striped border strips. I used my Fold-and-Press mitered border technique at each corner.
Soon I will post again with details on how you can easily do this on your next quilt top.
Now I just need to piece a back! Everything is laid out on the floor of my studio. Check back for an update on that too.

Red, White, and Blue Quilt - twin size - an original design by Mary Lachman in 2013.
Monday, August 26, 2013
CTFAC Exhibit and Labor Day Sale in Norfolk
I am a member of the Connecticut Fiber Arts Collective. If you haven't had a chance to over to Norfolk to see our exhibit of handmade gift items at the Norfolk Artisans Guild in the center of town there is still time.
The exhibit and sale continues through September, including Labor Day weekend. The Artisans Guild is open Wednesday thru Sunday, and while you are there you might like to take in a show at Infinity Hall or a bite to eat at one of the local taverns.


Saturday, July 20, 2013
Felting Vintage Textiles - Mary Lachman's technique in Quilting Arts Magazine - August/September 2013
I am thrilled to announce the publication of my technique to recycle vintage crocheted doilies and create new fabric pieces. It is in the August/September 2013 issue. If you are not already a subscriber, you can order a copy online today or find one at your nearest fabric shop or bookseller!


Below is a photo of a piece that was not selected for the publication, but this is the "before" the felting process with the doily sandwiched between a base of wool roving and decorative roving laid out on top.

And this photo shows the same piece after it has been felted and quilted. The new piece can stand on its own, be mounted on canvas or fabric, or be incorporated into another quilt. The possibilities are endless. Try it today. If you have any questions, please send me a comment.

Thursday, June 20, 2013
Scotch Twist - Free Quilt Pattern
Time for another baby quilt! This one is off to Baby D, son of my friends Savva and Yanna. This is my original design. I have written out the pattern if you would like to make one for a little cherub in your neighborhood.
 |
| Scotch Twist 32" x 32" |
 |
| Scotch Twist Closer View of Center Square |
Scotch Twist Quilt
Size: 32” x 32”
By Mary Lachman
Quilt designed by Mary Lachman
Quilt made by Mary Lachman
Materials Needed
· 2 dark fat quarters – chose floral, novelty or stripes to contrast with the light fabrics and sashing
· 2 light fat quarters
· 1/3 yard dark fabric for sashing
· Scrap fabrics to blend with the dark and light fat quarters
· ¼ yard for binding
· 1 yard backing fabric – or use the excess fabric from the fat quarters to piece the back
· 36” square quilt batting
· Thread to match fabrics
· Hand or machine quilting thread
Tools Needed
· Ruler
· Rotary cutter and mat
· Scissors
· pencil
· Iron and ironing board
Cutting and Piecing Directions
Step One: Cut the Fabric Pieces
1. All measurements include ¼” seam allowance.
2. Cut out the fabric pieces
3. Cut the fabric along the crosswise grain the total width of your fabric.
4. Cut eighteen 4 7/8” squares from dark and light fat quarter ( note to self: can get 12- 4 7/8” squares out of each FQ).
5. Cut eight 1 ½” strips from dark sashing fabric.
6. Cut four 2 ½” strips from binding fabric.
7. Cut remaining scraps into 2 ½”strips for pieced border
Step Two: Piece the Quilt Blocks Note: all dimensions on the cutting chart are cut size. The number at the top of each column is the width of each cut in that column
Make Half Square Triangles (HSTs)
1. Layer one dark 4 7/8” square with one light 4 7/8” square, right sides facing.
2. With a pencil, draw a diagonal line from one corner to another of the light square.
3. Stitch a 1/4” on each side of the diagonal line.
4. Use rotary cutter to divide the HST on diagonal pencil line. Each 4 7/8” square will yield two 4 ½” HST squares. Press seam toward dark fabric.
Make Pinwheel Blocks
1. Arrange four, 4 ½”HST squares, alternating dark and light corners to form resemble pinwheels.
2. Stitch two squares together. Press seam.
3. Stitch other two squares together. Press seam.
4. Stitch each of the two squares into a 4 square pinwheel unit. It should measure 8 ½” square.
5. Arrange pinwheel blocks on design wall or floor to check arrangement.
Sash in Between Pinwheel Blocks
1. Stitch 1 ½” strip to one side of six pinwheel blocks.
2. Press seam toward 1 ½” strip.
3. Align other side of 1 ½” strip on one block to un-sashed opposite side of another block. (You will be matching 3 to 3.)
4. Stitch together. (Your section of blocks will be: pinwheel-sash-Pinwheel-sash).
5. Stitch another pinwheel block to the end sash of each line of blocks (pinwheel-sash-pinwheel-sash-pinwheel)
6. Stitch two 1 ½” x 44” strip in between each row of pinwheel-sash-pinwheel-sash-pinwheel. Trim off excess of 44” strip even with the end of blocks.
Add Outer Borders
1. Strip piece 2 ½” wide short lengths of medium and light scrap fabrics end to end until piece measures 24” long. Add a 2 ½” x 6” length of the same color of fabric to each end. Make a total of 4 strips like this one.
2. Stitch a 1 ½” x 44” strip to one of the scrappy strips made in the first step.
4. Repeat steps 2 and 3, three more times.
5. Stitch borders on, miter corners if you prefer.
Make a Quilt Sandwich and Quilt
1. Sandwich quilt top, batting and backing together.
2. Pin to hold in place.
3. Quilt as desired. The sample was quilted by hand ¼” from each of the seams.
Bind
1. Stitch four 2 ½” fabric binding strips end to end. Press seams open.
2. Fold and press the strip in half lengthwise.
3. Place binding on right side of quilt matching raw edges of binding to edge of quilt.
4. Stitch the binding onto the quilt ¼” from edge.
5. Fold binding over to back of quilt.
6. Finish by stitching binding to back by hand or machine.
Sunday, June 9, 2013
Bartlett Arboretum and Botanical Inspirations
The opening reception for Botanical Inspirations: Capturing Nature in Fiber is today from 12 noon to 4 p.m. in the Visitor Center at the Bartlett Arboretum.

Come out and see the show---Bring a friend and tour the gardens. More than 25 works of art will be on exhibit featuring all members of the CTFAC (Connecticut Fiber Arts Collective), a group of artists dedicated to fiber and mixed media.
The exhibit continues through June at the Bartlett Arboretum and Gardens, 151 Brookdale Road, Stamford, Connecticut.
Saturday, May 18, 2013
"Beyond the Bed: The American Quilt Evoluton" in Katonah, NY
Last week on my way home from work I drove to Katonah, NY to see the quilts at the art museum.
It is a lovely exhibit combining traditional and contemporary works of art. There are several vintage quilts on loan from the Shelburne Museum, as well as a Gee's Bend quilt in polyester, a wire and metal wall hanging, a 3-dimensional free-standing quilt, and an all-wood, carved and sanded quilt-artwork.
If you can spare the time, it is well worth a visit before the exhibit closes June 13th. Check the website for docent tour dates and times. http://www.katonahmuseum.org
(And although the museum is the opposite direction from downtown Katonah, the quaint village is a great place to grab a coffee or a bite to eat.)
Saturday, April 27, 2013
Spiraling Out
 |
| Spiraling Out of Control 17" x 48" |
I just finished this piece. I am calling it "Spiraling Out of Control". It was started more than a year ago with machine-pieced fabric based that I quilted using a free-motion swirling design. Then I sprinkled powdered fabric dye on top and added fabric spirals backed in fusible web.
Sunday, April 14, 2013
Sneak Peak - Felting Vintage Textiles
I am pleased to learn that an article I wrote, "Felting Vintage Textiles", has been accepted for publication in the August/September 2013 Quilting Arts Magazine!
The article explains my technique in step-by-step detail with lots of photos to enhance your understanding. Here are a few pictures showing the before and after of two projects. Be sure to look for a copy of Quilting Arts Magazine later this year for a full article.
The article explains my technique in step-by-step detail with lots of photos to enhance your understanding. Here are a few pictures showing the before and after of two projects. Be sure to look for a copy of Quilting Arts Magazine later this year for a full article.
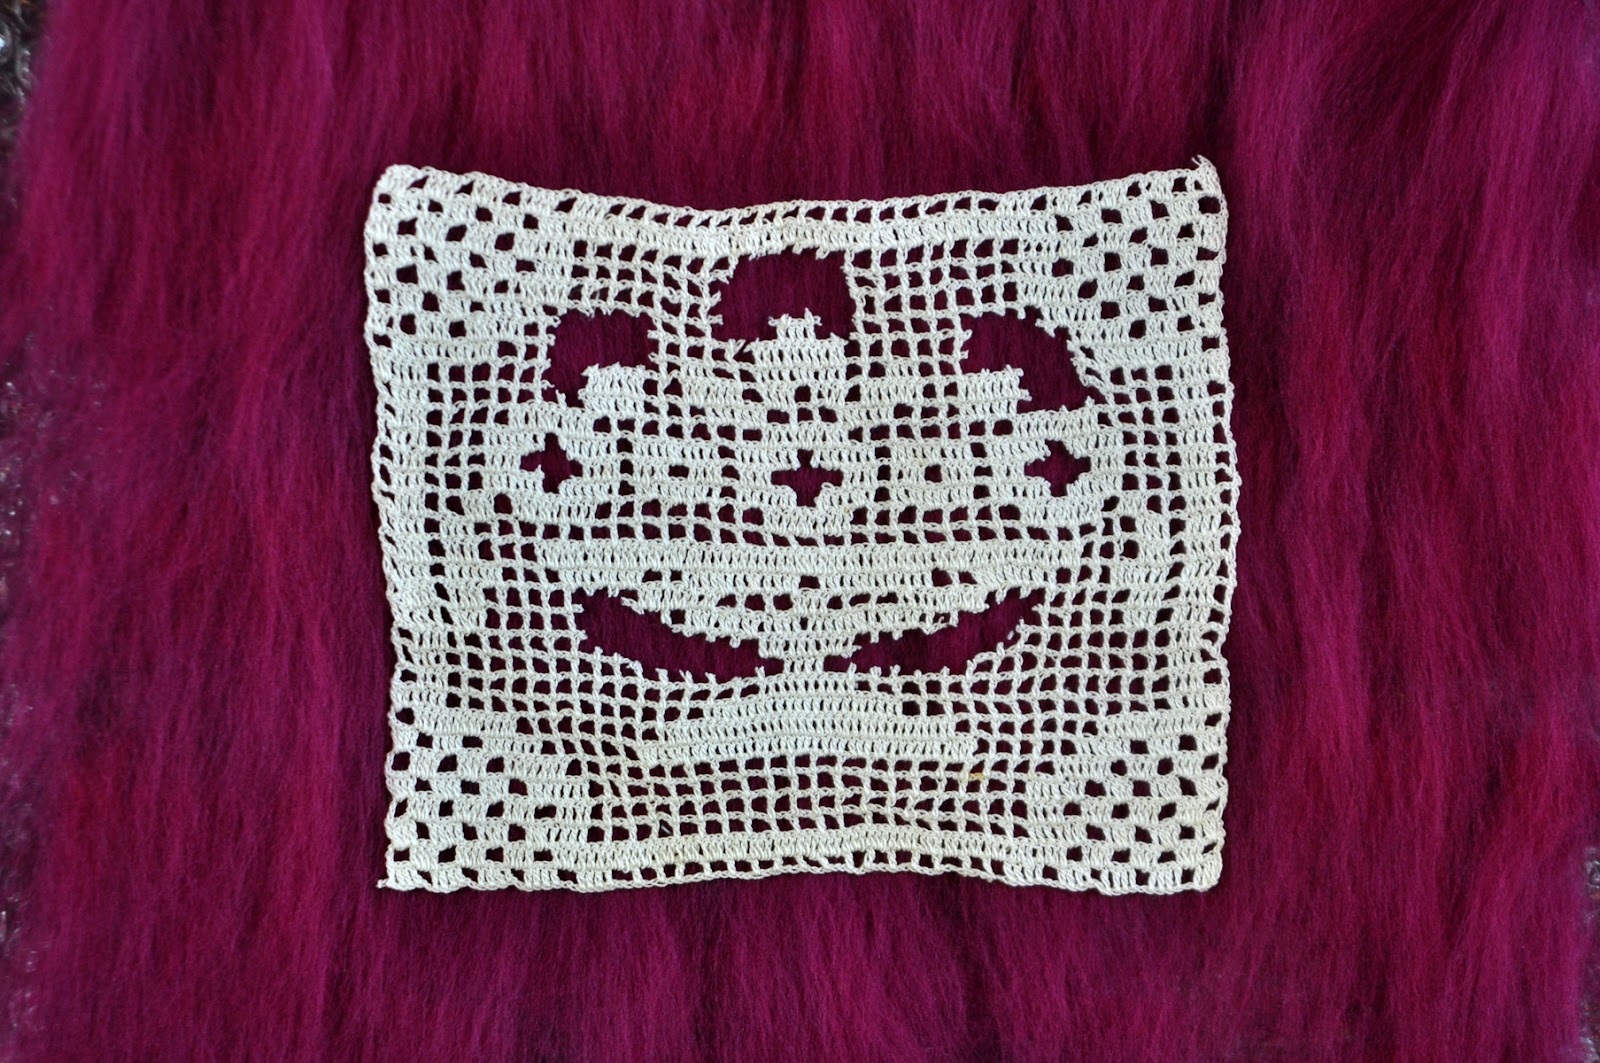 |
| Before: crocheted panel is laid atop wool roving |
 |
| After: crocheted panel has been sandwiched in wool fabric |
 |
| Work in Progress |
|
| Before |
|
| After |
Monday, March 18, 2013
SAQA Regional Show - "Local Color"
My quilt "Aerial View" was selected for the regional Connecticut SAQA exhibit that opens in May 2013 at the Western Connecticut State University in Danbury.
All the quilts in the exhibit have a Connecticut theme. Mine was inspired by a recent airplane flight into Bradley Airport.
All the quilts in the exhibit have a Connecticut theme. Mine was inspired by a recent airplane flight into Bradley Airport.
| Aerial View 2013 |
Sunday, February 17, 2013
Felting in Hartford
Yesterday, my art quilt group, Connecticut Fiber Artists Collective (CFAC) sponsored a wool felting workshop at the Unitarian Society of Hartford.
What a fabulous day full of fiber and fun! We learned to nuno felt under the tutelage of Robin McCahill, a master felter, teacher and puppeteer.
Here are some pictures of our day.
What a fabulous day full of fiber and fun! We learned to nuno felt under the tutelage of Robin McCahill, a master felter, teacher and puppeteer.
Here are some pictures of our day.
 |
| Glorious bumps of wool roving in all colors |
 |
| Placement of wool roving in layers on bubble plastic prior to felting |
 |
| Toni proudly displaying her "to be" flowers and leaves |
 |
| Toni and Roz rolling |
 |
| A finished scene- wool roving on silk chiffon- magnificent! |
Monday, January 28, 2013
Joe's Quilt - Free Quilt Pattern

Joe’s Quilt
Size: Approximately 46"x90"
By Mary Lachman
Quilt designed and made by Mary Lachman
Materials Needed:
- Dark and medium fabric scraps or fat quarters – choose a variety of large, medium and small florals and patterns (flannels works well)
- 2 yards of light fabric
- ½ yard for binding fabric
- 3 yards backing fabric
- quilt batting of your choice
- Thread to match fabrics
Cutting and Piecing Directions:
Four-Patch "Bricks":
- Cut 3 1/2" x 4 1/2" rectangles from dark and medium fabrics.
- Sew two of the 3 1/2" x 4 1/2" rectangles together along the 4 1/2" edge, press toward the darker.
- Sew two more 3 1/2" x 4 1/2" rectangles together along the 4 1/2" edge, press toward the darker.
- Sew each set together along shorter edge.
- The Four-Patch Brick should measure 5 1/2" x 8 1/2"
Light Bricks:
- Cut 5 1/2" x 8 1/2" rectangles from light fabric
Assembly:
- Sew Four-Patch Bricks and Light Bricks together in rows, alternating each brick.
- As shown, the quilt is 9 bricks (width) and 11 bricks (length) but you could make it any size you wish.
- Once the top is completed, layer backing, batting and top.
- Quilt as desired and bind. Make sure to label your finished artistry with your name and date of completion!
Friday, January 18, 2013
Quilt Envy
Eight years ago, when a friend gave birth to her second child, I presented her with a handmaded scrappy baby quilt. She adored it and so did her son. For years since she has repeatedly told me how much she and Alex enjoy looking at the colors and patterns.
Interestingly Alex has become a very artistic boy who is always drawing and painting pictures. Recently his mom asked me to stop by for tea and cake. I took along a few quilts to share with her and Alex. Alex showed me his paintings and gave me a tour of his bedroom, which he shares with his brother, Joe. There at the end of Alex's bed was the baby quilt I had presented him with 8 year ago---a little faded, but clearly loved.
It was clear to me Alex needed another quilt, a bigger one, now that he was a big boy, and I thought I had the perfect one at home that I finished last November. I told my friend of my plan and if it would be ok to give Alex a quilt, but not Joe. She assured me that it would be fine.
So, a few days later I presented her with a scrappy flannel quilt made from 4 1/2 inch squares. Here is a picture of Alex curled up on top of his new quilt!
But sometimes one is not enough!
Alex's older brother, Joe (10 years old) was mesmerized by the new quilt on his brother's bed (too his mother's surprise) and it just happened that I had another recently flannel quilt in the closet. Just the trick for a belated birthday present!
Check back to the blog in the next week or so and I will share my patterns for both of these quilts.
Interestingly Alex has become a very artistic boy who is always drawing and painting pictures. Recently his mom asked me to stop by for tea and cake. I took along a few quilts to share with her and Alex. Alex showed me his paintings and gave me a tour of his bedroom, which he shares with his brother, Joe. There at the end of Alex's bed was the baby quilt I had presented him with 8 year ago---a little faded, but clearly loved.
It was clear to me Alex needed another quilt, a bigger one, now that he was a big boy, and I thought I had the perfect one at home that I finished last November. I told my friend of my plan and if it would be ok to give Alex a quilt, but not Joe. She assured me that it would be fine.
So, a few days later I presented her with a scrappy flannel quilt made from 4 1/2 inch squares. Here is a picture of Alex curled up on top of his new quilt!
 |
| Alex's Quilt |
Alex's older brother, Joe (10 years old) was mesmerized by the new quilt on his brother's bed (too his mother's surprise) and it just happened that I had another recently flannel quilt in the closet. Just the trick for a belated birthday present!
 |
| Joe's Quilt |
Subscribe to:
Posts (Atom)
Creative Magic
In her book Big Magic , Elizabeth Gilbert (who is best known as the author of Eat, Pray, Love ) writes "I believe the creative process ...

-
 Karen Belsky Loprete died two weeks ago, on August 1st. She was a creative woman with an incredible zest and flair for art. I cannot believe...
 -
 In her book Big Magic , Elizabeth Gilbert (who is best known as the author of Eat, Pray, Love ) writes "I believe the creative process ...
 -
 As the wind and rain begin to blow, and the leaves change to those brilliant fall colors I begin making felted wool hats. I handknit them....